
Invitation to a company party: Templates & text blocks for every occasion

Anna Fredholm
June 19, 2026
•
4
min

You can access account management through the "Accounts" menu item in Oniva admin. If the menu item does not appear, you are not authorised to manage accounts.

As an admin with account management rights, you can independently manage your client’s accounts in Oniva. You can edit, block or delete existing accounts, as well as create new ones.
You can find account management in the settings menu of the Oniva Admin (top right). If accounts are not displayed, you do not have the required permissions. In this case, please contact your admin or support@oniva.events.
The account list shows all current users. Users with admin roles are marked with a crown icon. Existing accounts can be edited via the action menu (···). Admin rights can also be edited per account here.
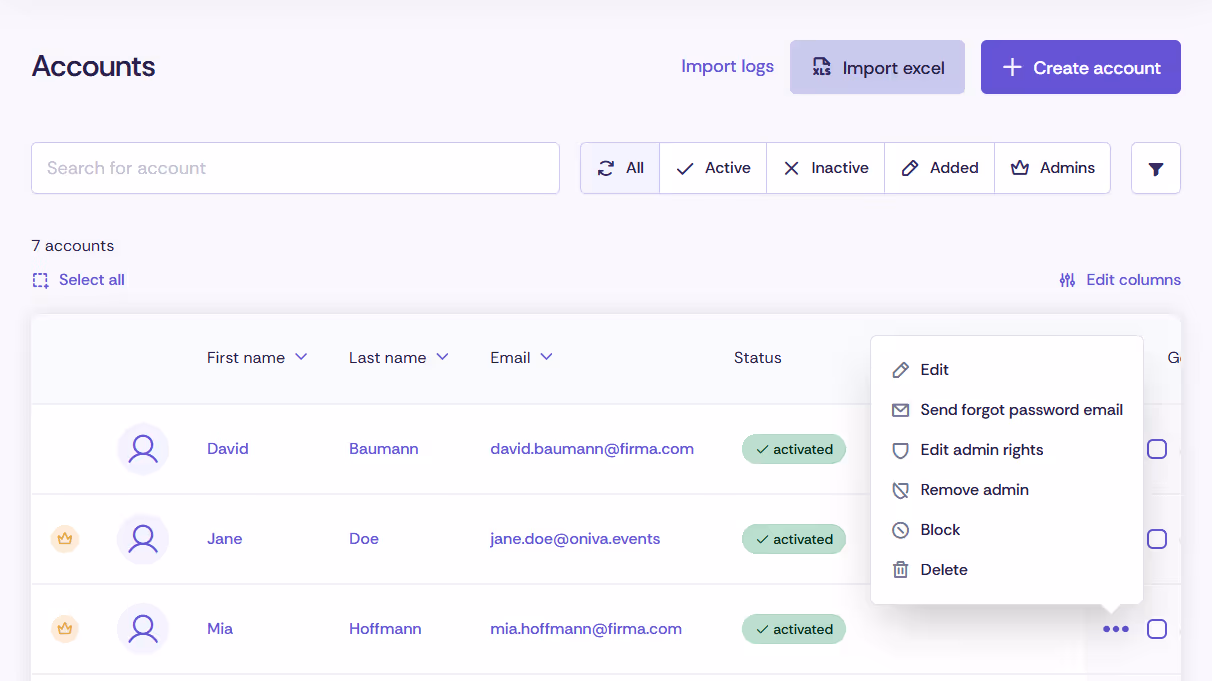
New accounts can be created via the button. For new accounts, at least the first name, last name and email address must be provided. If required, the account can also be assigned directly to an account group. No notification is sent immediately after the initial creation.
Newly created accounts initially have the status “added”. This means that the account is not yet activated and the user cannot log in. Only once the account has been activated can the user log in to the system.
💡 Note: If the newly created account is intended to be an admin account, admin rights can be assigned before activation. This allows the user to log in immediately after activation and use the correct admin rights.
After the account has been created and the desired rights have been assigned, it can be activated. You can decide whether:
In both cases, the password must be reset first.
To create a large number of accounts in Oniva, accounts can be imported using an Excel file. Click “Import Excel” to start the import process.
First, select the account type to which the accounts should be assigned. The available account types can be managed by the tenant admin. Then select the Excel file to be used for the import. Finally, confirm consent to the processing of personal data to ensure that the affected persons have agreed to the intended use of their data.
To assign the data to be imported to the relevant data fields, you must map the data from the Excel file to the existing data fields in Oniva in step 2.
Check that the selected data fields are correctly mapped and complete the process using the “Import” button.

To block an account, navigate to the account list and select the corresponding account. Then, in the action menu (···), click "Block" or "Delete". The status of the account is displayed in the list entry:
Manual unblocking:
To activate a blocked account, select "Unblock" in the action menu.
Automatic blocking:
If Oniva has an interface to an account database (e.g., Active Directory), inactive accounts will be automatically blocked with regular data imports.
When account registration is enabled, users can request an Oniva account on their own. In this case, a “Create Login” link appears on the login page next to the “Forgot Password?” link. Users can fill out a form with all required account details.
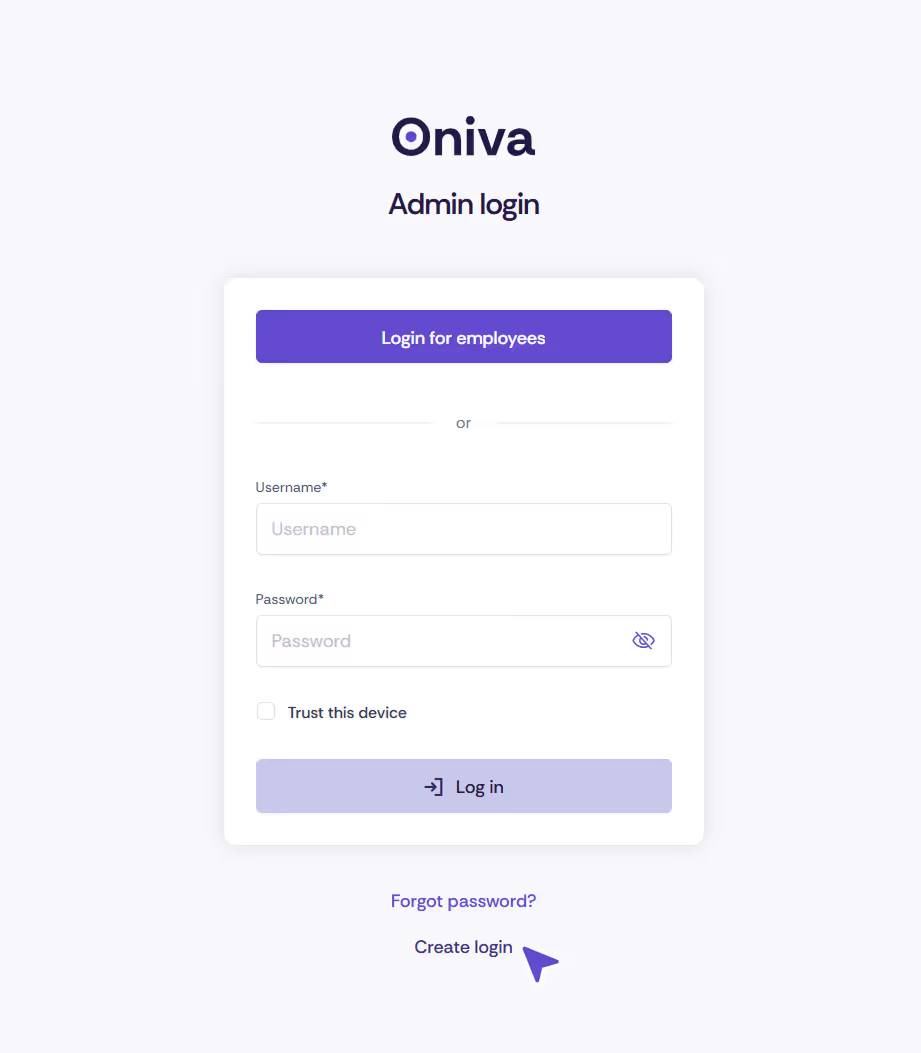
The account is then created in the background with an inactive status, and a notification “Account request waiting for approval” is sent to the team mailbox or other configured recipients. The responsible admin can approve or reject the account in the admin area. The user can log in only after the account has been activated by the admin.
Account registration can be enabled at the tenant level. See tenant settings.
Deactivating an account prevents login but does not automatically cancel existing event bookings. If the account is deleted, any bookings also remain, but the link to the account is removed.
Discover exciting articles about creating unforgettable events.

